When I lived in Montreal, one of my favorite meals that people often made for us were Pierogi. I’m not sure why they were so popular there but I fell in love. I even found a really good frozen brand that were easy to fry up on my own for a quick meal.

The sad thing is, I don’t think I’ve had them since I’ve been back in the states. I get cravings for them every once in awhile but then it passes before I think to try making them. As I was considering a new recipe to make for the Idaho Potato Commission, it popped into my head and I new that’s what I wanted to create.


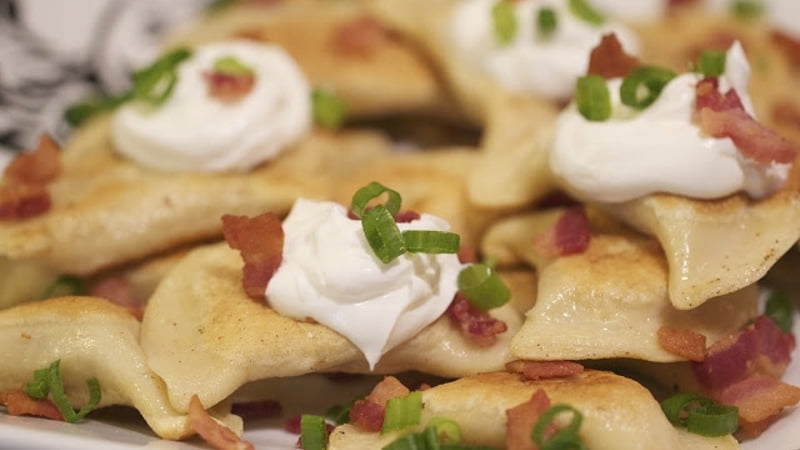
Pierogi are a great tailgating snack as they’re fairly easy to make (especially if you make a big batch ahead of time), they’re portable and are the perfect finger food. Put a whole bunch on a tray with a bowl of sour cream and you’re good to go. And honestly, I had you at the title when it said bacon and cheese, right?

Idaho® Potato Pierogi with Bacon and Cheese
Ingredients
+Dough
- 3 ½ cups all-purpose flour
- 3 eggs
- 1 teaspoon salt
- ¼ cup sour cream
- ¾ cup milk
+Filling
- 5 medium Idaho® potatoes, peeled
- 1 cube unsalted butter
- ½ cup milk
- 1 teaspoon salt
- 1 teaspoon pepper
- 6 slices thick cut bacon, cut into small cubes
- 1 cup shredded cheddar cheese
- 1 cup shredded mozzarella cheese
Directions
- Slice the potatoes into quarters and place in a large pot. Cover with cold water. Bring the pot to a boil and cook until potatoes are tender about 10-15 minutes.
- Drain the potatoes and mash them in a large bowl. Add the butter, milk, salt and pepper and mash to combine.
- In a large skillet, cook the bacon until crisp. Remove from pan and drain. Remove the grease from the pan but reserve for later use.
- Add the cooked bacon to the potato mixture.
- In the bowl of a stand mixer, combine the flour, eggs, salt and sour cream. Gradually add the milk. Using a dough hook, knead the dough for 5-6 minutes. Add additional flour if the dough is sticking to the sides of the bowl.
- Remove the dough from the bowl and wrap in plastic wrap. Let the dough rest for 30 minutes.
- Cut the dough in half and roll each half into a large circle, approximately 1/8 inch thick. Using a 2.5-inch cookie cutter, cut rounds out of the rolled dough.
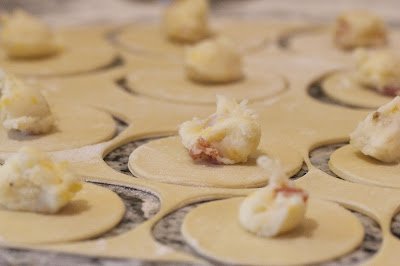
- Place 1 teaspoon of the potato mixture into the center of each circle. Fold the top of the circle over the filling, creating a half circle. Starting in the center of the round, press the edges together to seal, moving out to the edges.
- Add the pierogi to a pot of salted boiling water 5-6 at a time. The pierogi will sink to the bottom and then rise to the top. After they come to the top, continue to cook for 1 minute and then remove from the water and drain.
- Using the skillet you cooked the bacon in, heat 2 tablespoons of the reserved bacon grease over medium high heat. Fry the pierogi in the hot oil until browned, turning to cook each side. Add additional grease as needed.
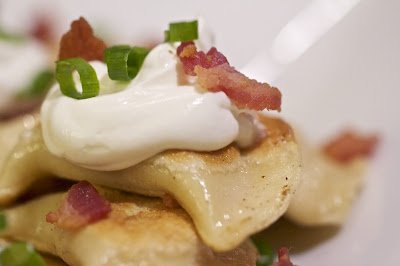
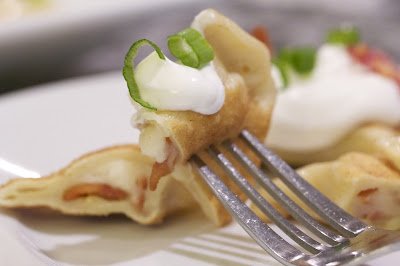
- Serve with sour cream.
Time Saving Tip: Make a double batch and freeze the pierogi for later use. Simple freeze them once they are formed before the boiling stage. Then remove them from the freezer, boil and fry!
Related Articles to Thyme In Our Kitchen
- Mahi Mahi Tacos Recipe
- Salmon Croquettes
- Bacon Wrapped Pork Tenderloin with Apple and Sausage Filling
- Jay Ducote and Food Network Star
- Pistachio French Macarons
- Baked Apple Dumplings
- Wild Rice and Hummus Burgers
- Hummus and Edamame Pasta with Caramelized Tomatoes
- Rosemary-Pine Nut Cookies
- Danish Yeast Rolls
- Sweetheart Coffeecake
- Chicken and Sausage Gumbo
- OXO Giveaway
- How to Spatchcock a Turkey
- Cinnamon Swirl Brioche
- Bacon Wrapped, Sausage Stuffed Jalapeno Peppers
- Zesty Zucchini Twist
- Classic Lattice Top Cherry Pie
- Cherry-Lime Sorbetto
- Cardamom Bread
- Sourdough Sandwich Rolls
- Flank Steak with Pineapple Salsa
- Blog and Bake Part Two
- Blitz Puff Pastry & Palmiers
- Pecan Caramel Sticky Rolls
- Candy “Sushi”
- Shepherd’s Pie
- Oxtail Ragu and Fennel Pollen Pasta
- Morel and Asparagus Lasagna
- Coconut and Lemon Curd Cupcakes

I am sure you love food. Otherwise, you won’t be here. As a full-time and a part-time chef at a local restaurant, I know my way around food. Ever since I was a young girl, I enjoyed helping my mom in the kitchen.
We would often experiment with the spices, ingredients, and flavors and create great meals for my brothers and dad. Since cocking was my first passion, I decided to go in that direction. I finished culinary school, got my first job, and started developing my skills.
Later when kids came, I had all the liberty in the kitchen to combine some of the unique flavors. A lot of them were a success, but now and there I would make a couple of mistakes.
