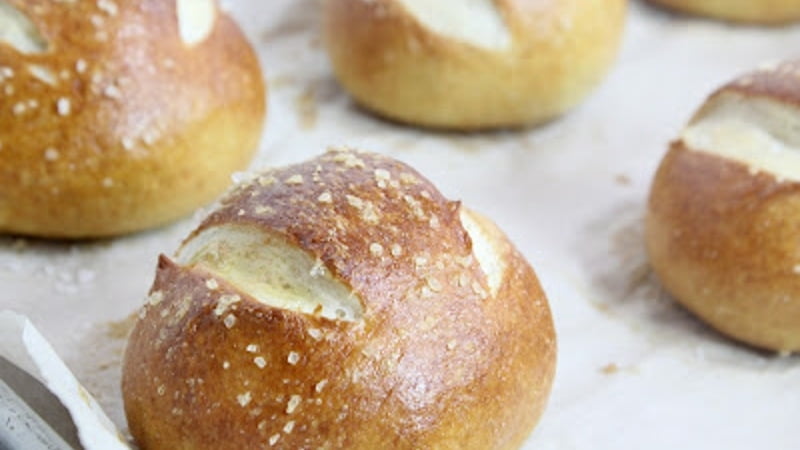
I was making my weekly trek through Costco last week and I noticed they are selling pretzel rolls now at our location. I was going to grab a bag and then I thought, nah, I can make these myself. I know I just made the pretzel bites a few weeks ago, but these are pretty different, and pretty amazing.
You get the great soft dough on the inside and the chewy exterior of a pretzel, just in a roll format. This means you can use it for all sorts of things, that is if they last long enough. I made various sized rolls and had great plans to use some for hamburgers and sandwiches but we ended up eating them all as is. That just means I have to make them again soon.

After raising for a short period, the rolls take a hot bath in some water and baking soda. I hadn’t realized that the key difference here between a bagel and pretzel is the baking soda in the water. It creates an alkali solution that helps get that deep brown color and aroma. You also use an egg wash to help get additional browning. Use a good coarse salt for sprinkling on the top.
Pretzel Rolls
adapted from My Life as a Mrs.
Ingredients
- 1 ½ cups warm water (110°F)
- 1 package active dry yeast (not instant rise yeast)
- 2 teaspoons sugar
- 4-½ cups unbleached all-purpose Flour
- 2 teaspoons Kosher salt
- 4 tablespoons unsalted Butter, melted
- ¼ cups baking soda
- 1 whole egg, lightly beaten
- Pretzel Salt, for sprinkling
Directions
Combine the water, sugar and yeast in the bowl of a stand mizer and let rest until foamy, about 5 minutes.
Mix in the flour, salt and butter using the dough hook and knead for 5 minutes until smooth and satiny, adding additional flour to keep it from sticking to the sides of the bowl.
Remove from bowl, spray the inside of the bowl with nonstick spray and then return the dough to the bowl. Cover and let rise in a warm place until doubled, about 1 hour. Punch the dough down and turn out onto a lightly floured surface.
Divide the dough into 8 pieces, or 16 if you want smaller rolls, and using you hands, form a smooth ball, pinching the seams underneath the ball. Place on a piece of parchment paper, with the seam side down, cover and let it raise for 30 minutes.
Preheat oven to 425°F and place oven rack in the middle position. In a large saucepan, bring 2 quarts of water to a low boil. Remove from heat and slowly add the baking soda. Place back over the heat and keep it at a simmer.
Place 2-3 of the rolls into the water at a time and cook for 1 minute, flipping them over after 30 seconds. Remove them with a slotted spoon and place them on a baking sheet lined with parchment paper.
Using a pastry brush, brush each roll completely with some of the egg wash and sprinkle generously with the coarse salt. Using a sharp serrated blade, slash the top of the rolls. You can do an X, slash down the middle or two slashes off centered.

Bake the rolls for 15-20 minutes or until deep golden brown. Enjoy!

Related Articles to Thyme In Our Kitchen
- Mahi Mahi Tacos Recipe
- Salmon Croquettes
- Bacon Wrapped Pork Tenderloin with Apple and Sausage Filling
- Idaho® Potato Pierogi with Bacon and Cheese
- Jay Ducote and Food Network Star
- Pistachio French Macarons
- Baked Apple Dumplings
- Wild Rice and Hummus Burgers
- Hummus and Edamame Pasta with Caramelized Tomatoes
- Rosemary-Pine Nut Cookies
- Danish Yeast Rolls
- Sweetheart Coffeecake
- Chicken and Sausage Gumbo
- OXO Giveaway
- How to Spatchcock a Turkey
- Cinnamon Swirl Brioche
- Bacon Wrapped, Sausage Stuffed Jalapeno Peppers
- Zesty Zucchini Twist
- Classic Lattice Top Cherry Pie
- Cherry-Lime Sorbetto
- Cardamom Bread
- Sourdough Sandwich Rolls
- Flank Steak with Pineapple Salsa
- Blog and Bake Part Two
- Blitz Puff Pastry & Palmiers
- Pecan Caramel Sticky Rolls
- Candy “Sushi”
- Shepherd’s Pie
- Oxtail Ragu and Fennel Pollen Pasta
- Morel and Asparagus Lasagna

I am sure you love food. Otherwise, you won’t be here. As a full-time and a part-time chef at a local restaurant, I know my way around food. Ever since I was a young girl, I enjoyed helping my mom in the kitchen.
We would often experiment with the spices, ingredients, and flavors and create great meals for my brothers and dad. Since cocking was my first passion, I decided to go in that direction. I finished culinary school, got my first job, and started developing my skills.
Later when kids came, I had all the liberty in the kitchen to combine some of the unique flavors. A lot of them were a success, but now and there I would make a couple of mistakes.
